Welcome to our Support Portal. Search for answers using the search box below, or create a support ticket if you cannot find your answer.
-
Repairing a Lamp?
-
Product Info
-
-
- Wiring A BC Un-Switched Lampholder
- Wiring An S.Lilley BC Switched Lampholder
- Wiring a Plastic BC Lampholder
- Installing the 40mm BC 4 Part Lampholder
- Wiring the BC Push Wire Plastic Snap on Cap Lampholder
- Safer switched lampholder not working
- Aligning a BC Unswitched Lampholder
- Lampholder Bases explained
-
- Installing Arditi Brand Metal E27 Lampholder's
- How to unlock my ES & SES Lampholder
- Installing Arditi Brand Plastic E27 lampholder's
- How to install our push fit E27 and E14 lampholders
- Wiring an E27 Pull cord Lampholder
- Wiring an E27 Switched Lampholder
- Installing S.Lilley Brand Metal E27 Lampholders
- How to Install our Lampholder Cup and Cord Grip
- Lampholder Bases explained
-
-
- Kit 33 Installation Guide
- Kit 17 Installation Guide - ES Version
- Kit 32 Installation Guide
- Kit 21 Installation Guide
- Ceramic Side Entry Wiring Kit with a ES | E27 | Edison Screw Lampholder
- Ceramic Side Entry Wiring Kit with Unswitched BC | B22 Lampholder
- Kit 18 Installation Guide
- Kit 15 Installation Guide
- Kit 35 Installation Guide
- Plastic Wooden Table Lamp Fixing Kit With Backplate and Cover - BC Version
- Plastic Wooden Table Lamp Fixing Kit With Wood Nipple – BC Version
- Kit 12 Installation Guide
- Kit 11 Installation Guide
- Kit 8 Installation Guide
- Kit 1 Installation Guide
- Kit 21 Components
- Kit 40 Installation Guide
- Show Remaining Articles ( 2 ) Collapse Articles
-
- Articles coming soon
-
-
Creating a Lamp?
-
- How to fix or install a lampholder onto a ceramic item with limited hand access.
- How to turn a bottle into a light fitting
- Measuring Bottle Hole For Bung Size
- Converting a Hong Kong Paraffin Lamp into a Table lamp
- Installing our ceiling roses
- How to Convert a Gas Blow Torch Into a Light Fitting
- How to repair a light that has a lamp inside and outside
-
-
Videos
0 out of 5 stars
| 5 Stars | 0% | |
| 4 Stars | 0% | |
| 3 Stars | 0% | |
| 2 Stars | 0% | |
| 1 Stars | 0% |
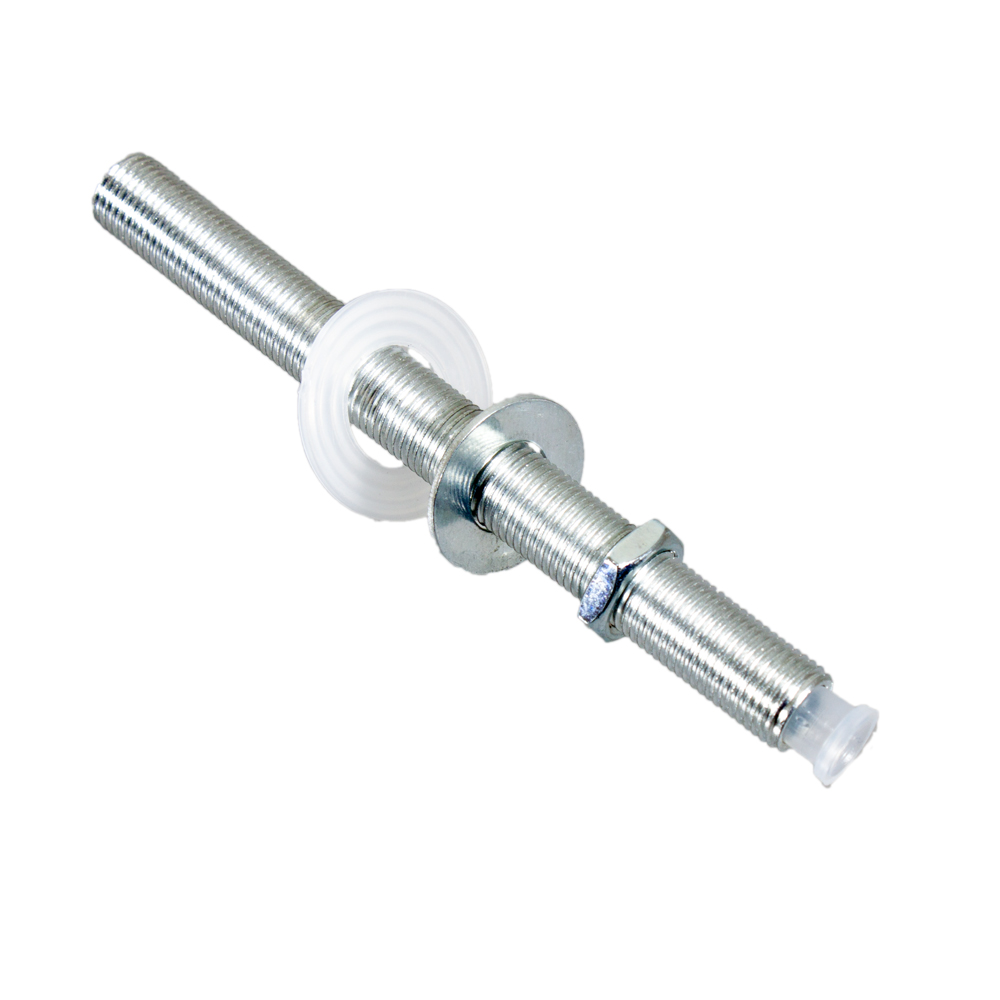
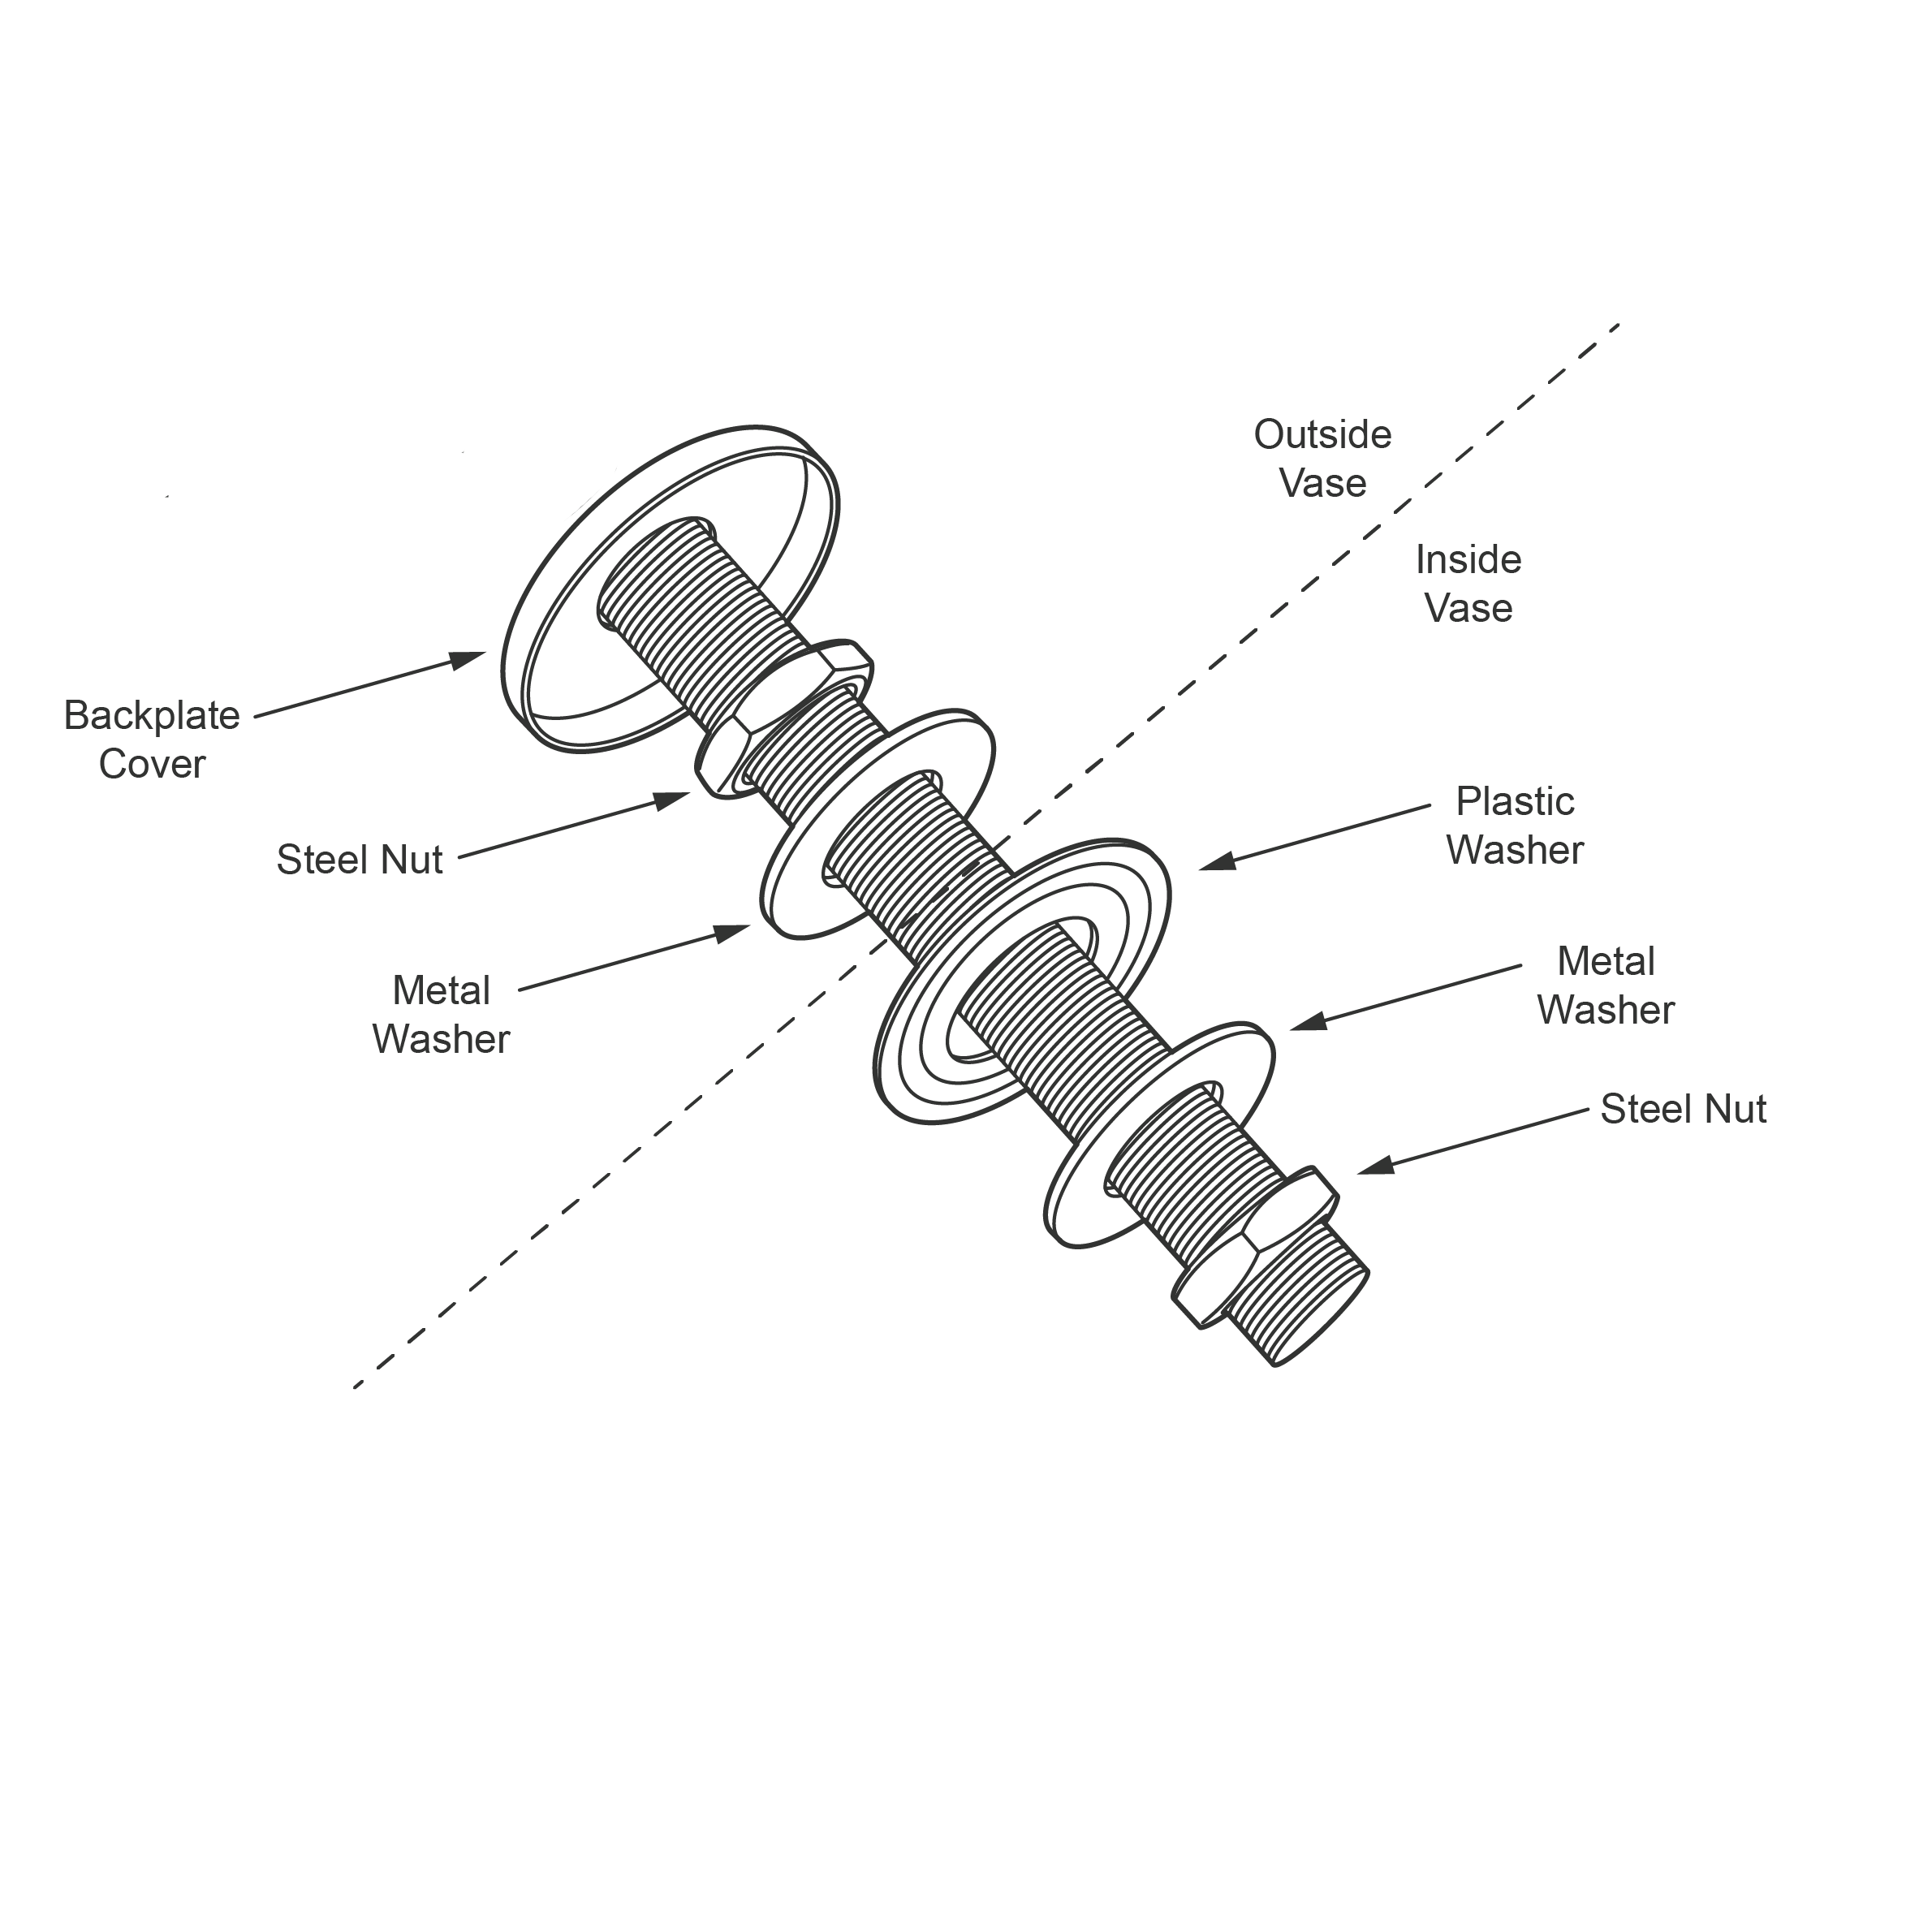
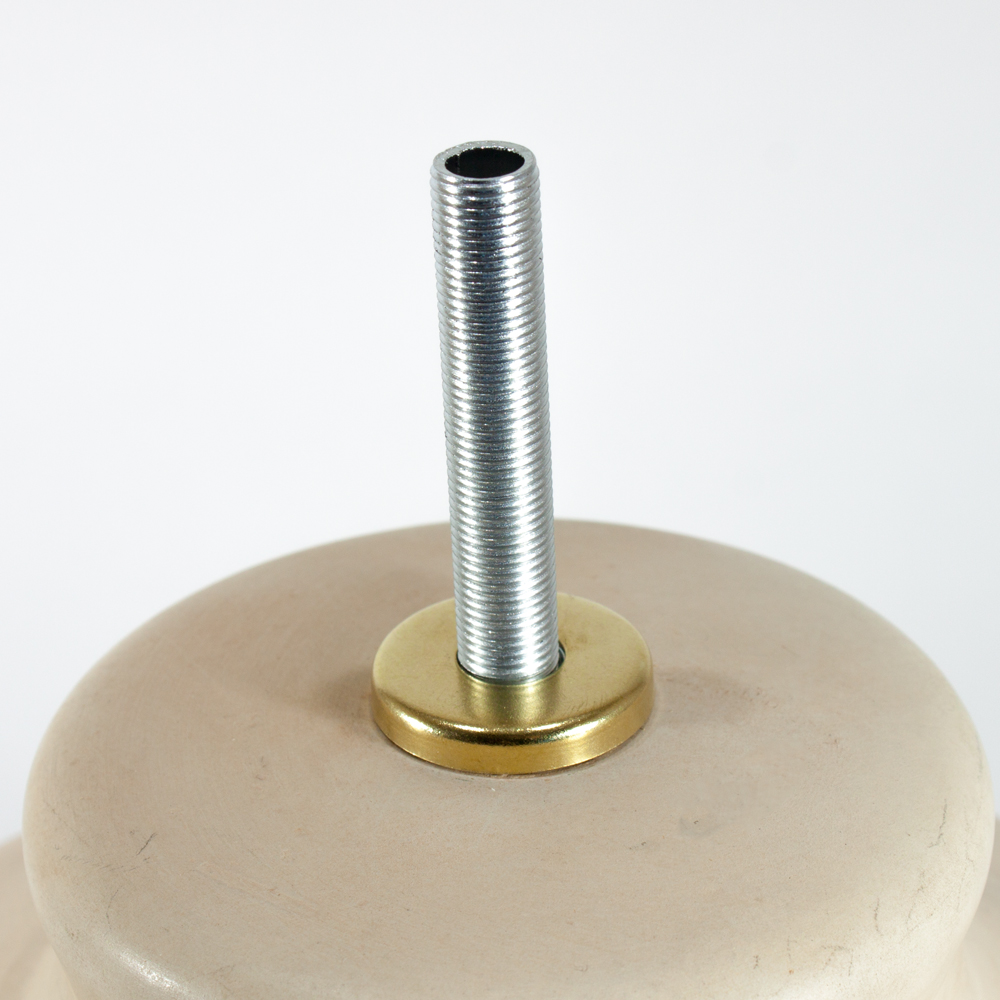
1 Step 1
Install the components onto the threaded rod as pictured below.
Ensuring the plastic washer is underneath, touching the ceramic base.
Please Note: This kit no longer comes with the grommet, as it's no longer required.
1 Step 2
Push the above assembly up through the hole in your vase/item so it is sticking out the top of the vase/item.
Ensure to keep hold of it once sticking out the top as you don't want it to fall down, alternatively, if you can lay the vase/item on its side this may help.
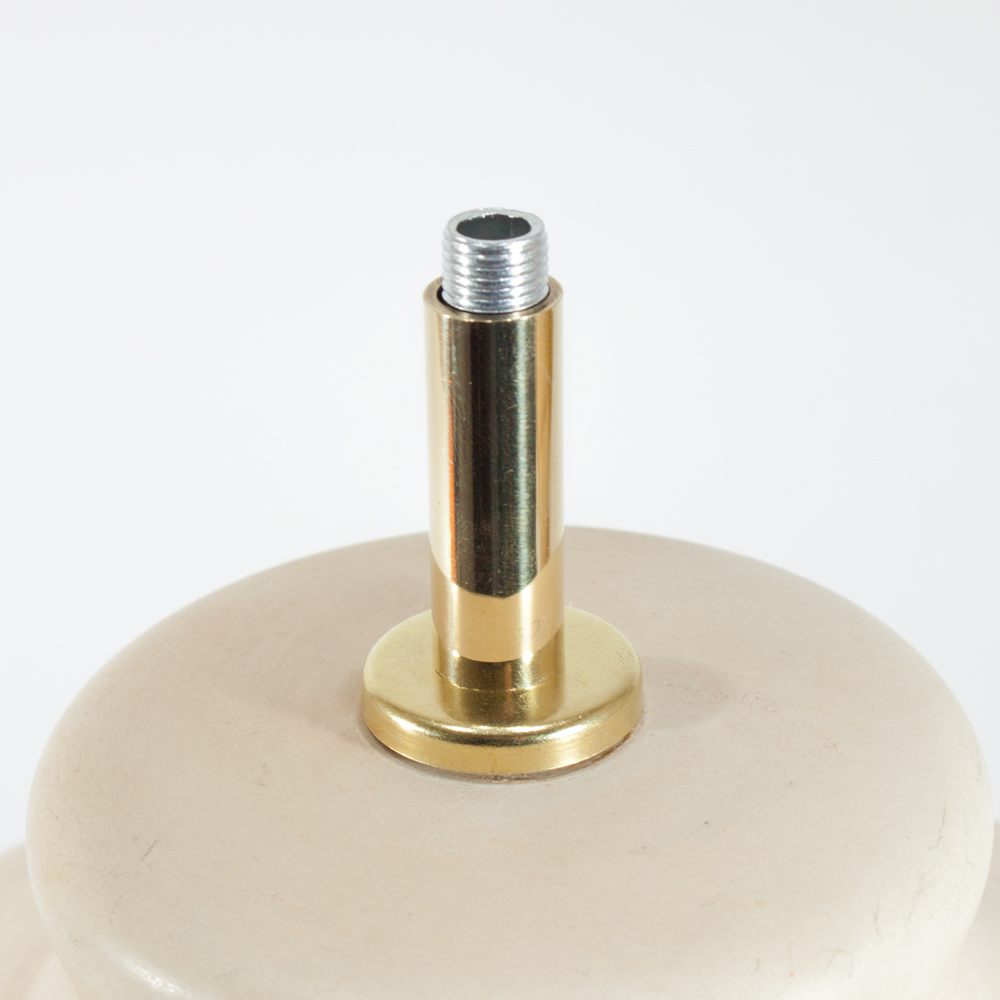
2 Step 3
Once the assembly is sticking out the top take the second metal washer and slide it onto the rod followed by the second steel nut.
1 Step 4
Before you tighten the assembly up ensure you have the correct length of thread sticking out the top:
- For the no spacer kit, leave 6mm of thread sticking out the top of the nut.
- For the 38mm kit, leave 50mm of thread sticking out the top of the lamp base.
- For the 75mm Kit, leave 87mm of thread sticking out the top of the lamp base.
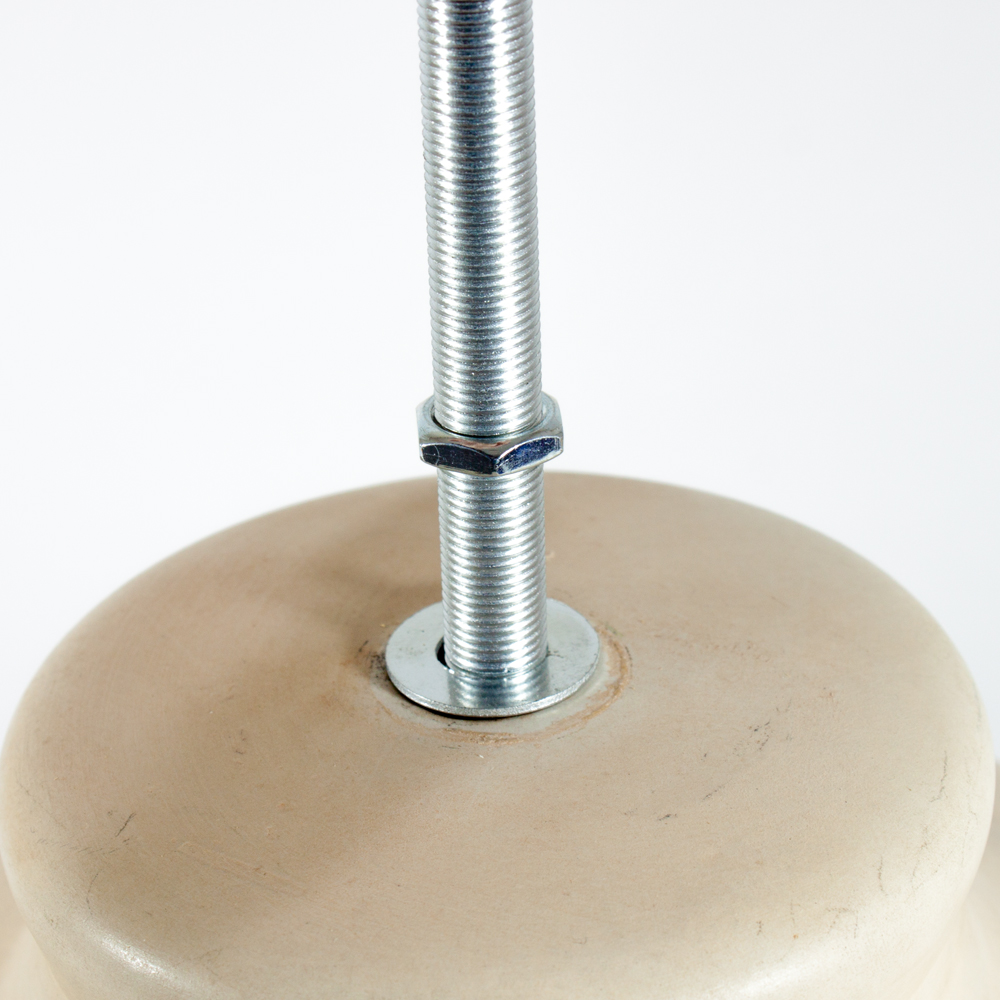
2 Step 5
Once you have the correct amount of thread sticking out the top you can tighten up the nuts, in most cases you can get away with holding the nut from the inside whilst you get a spanner on the nut on top.
3 Step 6
After the assembly is nice and tight you can slide the nut cover over the top followed by the tube cover. (If Selected)
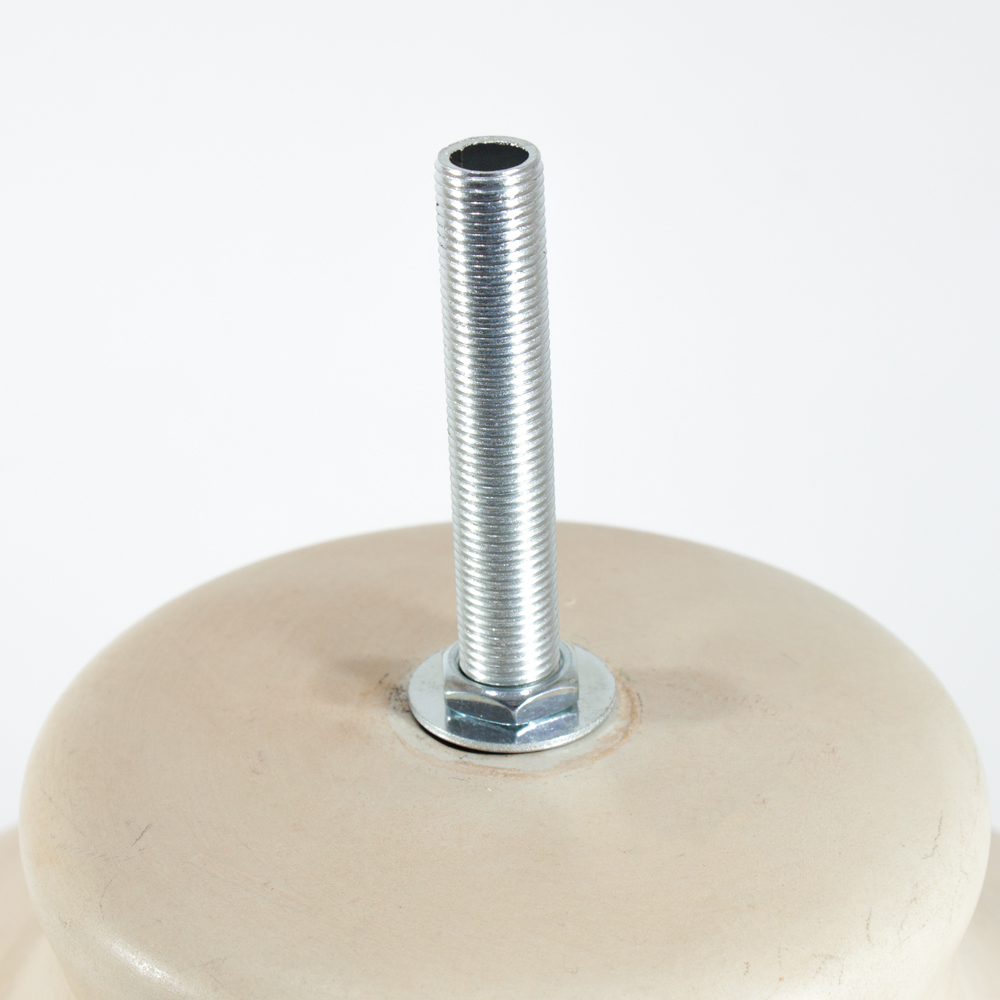
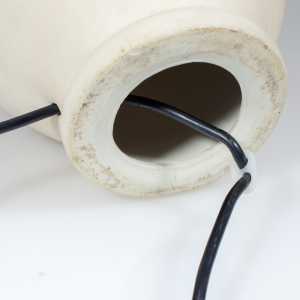
1 Step 7
The next step is to insert the cable, grab the black grommet supplied and insert this into the 10mm hole drilled into the vase/item.
Please note that you may not be able to use this part, if not, then ensure the hole is smooth and has no sharps bits.
2 Step 8
Take the cable and push it into the 10mm hole and out the bottom of the vase, then take the cord grip and feed the cable through one hole and then back through the other as seen below.
Ensuring that there is enough cable to come out the top of the assembly and ensuring the cord grip is touching the inside of the 10mm hole, you may need to re run this process to extend or shorten the position of the cord grip.
3 Step 9
Once this has been done, you can now take the cable and push up through the assembly.
For wiring the lampholder, please click the button below.
0 out of 5 stars
| 5 Stars | 0% | |
| 4 Stars | 0% | |
| 3 Stars | 0% | |
| 2 Stars | 0% | |
| 1 Stars | 0% |